
Friday 8 September 2017


Tuesday 5 September 2017


Monday 4 September 2017
Sunday 3 September 2017
Saturday 2 September 2017
Tuesday 29 August 2017


Saturday 12 August 2017
Zucchini fritters.
Zucchini fritters from smitten kitchen.
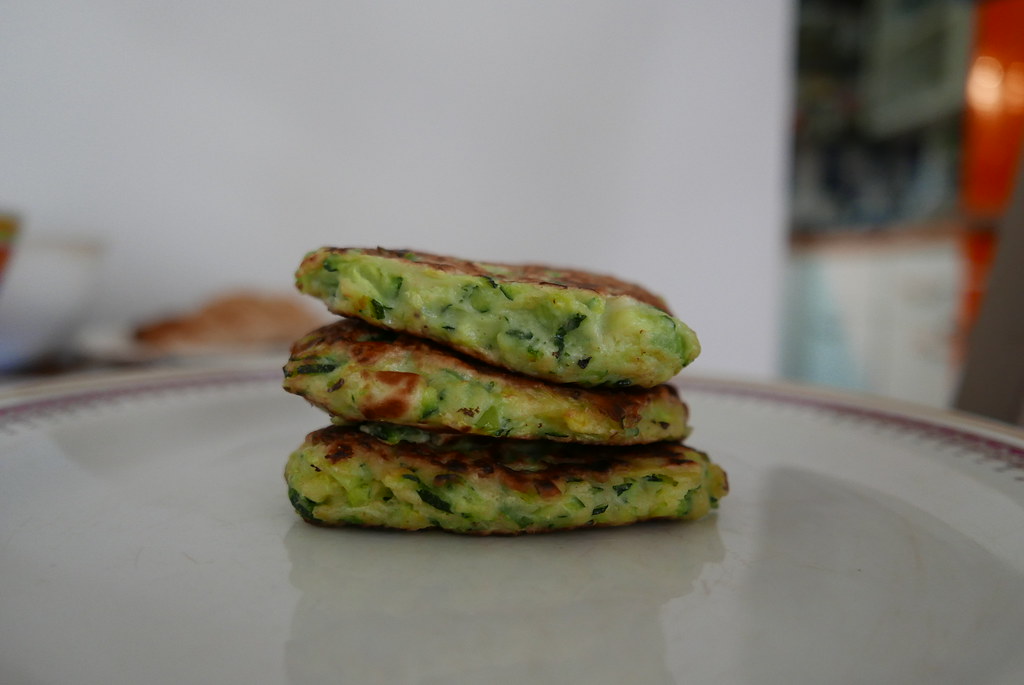
Yield: About 10 2 1/2 inch fritters
1 pound (about 2 medium) zucchini
1 teaspoon coarse or Kosher salt, plus extra to taste
2 scallions, split lengthwise and sliced thin
1 large egg, lightly beaten
Freshly ground black pepper
1/2 cup all-purpose flour
1/2 teaspoon baking powder
Olive or another oil of your choice, for frying
To serve (optional)
1 cup sour cream or plain, full-fat yogurt
1 to 2 tablespoon lemon juice
1/4 teaspoon lemon zest
Pinches of salt
1 small minced or crushed clove of garlic
Preheat oven to 200C.
Have a baking sheet ready.
Trim ends off zucchini and grate them either on the large holes of a box grater or, if you have one, using the shredding blade of a food processor.
The latter is my favorite as I’m convinced it creates the coarsest and most rope-like strands and frankly, I like my fritters to look like mops.
In a large bowl, toss zucchini with 1 teaspoon coarse salt and set aside for 10 minutes.
Wring out the zucchini in one of the following ways: pressing it against the holes of a colander with a wooden spoon to extract the water, squeezing out small handfuls at a time, or wrapping it up in a clean dishtowel or piece of cheese cloth and wringing away.
You’ll be shocked (I was!) by the amount of liquid you’ll lose, but this is a good thing as it will save the fritters from sogginess.
Return deflated mass of zucchini shreds to bowl.
Taste and if you think it could benefit from more salt (most rinses down the drain), add a little bit more; we found 1/4 teaspoon more just right.
Stir in scallions, egg and some freshly ground black pepper.
In a tiny dish, stir together flour and baking powder, then stir the mixture into the zucchini batter.
In a large heavy skillet — cast iron is dreamy here — heat 2 tablespoons of oil over medium-high heat until shimmering.
Drop small bunches of the zucchini mixture onto the skillet only a few at a time so they don’t become crowded and lightly nudge them flatter with the back of your spatula.
Cook the fritters over moderately high heat until the edges underneath are golden, about 3 to 4 minutes.
If you find this happening too quickly, reduce the heat to medium.
Flip the fritters and fry them on the other side until browned underneath again, about 2 to 3 minutes more.
Drain briefly on paper towels then transfer to baking sheet and then into the warm oven until needed.
Repeat process, keeping the pan well-oiled, with remaining batter.
I like to make sure that the fritters have at least 10 minutes in the oven to finish setting and getting extra crisp.
For the topping, if using, stir together the sour cream, lemon juice, zest, salt and garlic and adjust the flavors to your taste.
Dollop on each fritter before serving.
These fritters are also delicious with a poached or fried egg on top, trust me.
Do ahead: These fritters keep well, either chilled in the fridge for the better part of a week and or frozen in a well-sealed package for months.
When you’re ready to use them, simply spread them out on a tray in a oven until they’re hot and crisp again.
Friday 4 August 2017
Thursday 3 August 2017
Chickpea Broccoli Rabe Hearty Soup.
Chickpea Broccoli Rabe Hearty Soup Recipe | The Local Rose:
Ingredients:
3 tsp olive oil
2 slices pancetta, chopped fine (omit for vegetarian version)
1 large or 2 small carrots peeled and diced
2 celery stalks diced
1 onion diced
4 oregano sprigs
A pinch of dried chile flakes (optional)
salt
4 garlic cloves chopped
2 cups cooked chickpeas
2 cups chickpea cooking liquid
2 cups chicken stock (or vegetable)
1 bunch broccoli rabe
Olive oil
Heat heavy soup pot add: 2 tsp oil, pancetta.
Cook for 3 minutes add, carrots, celery, onion, oregano, chile.
Cook stirring now and then, until soft and slightly brown about 12 minutes.
Turn heat down if too brown.
When vegetables are cooked add: salt, garlic, chickpeas, chickpea liquid, stock.
Bring to a boil, reduce to simmer.
Cook for 10 minutes.
Meanwhile trim and rinse the broccoli rabe and discard stems.
Chop coarsely and add to the soup.
Cook for 10 minutes.
If not tender cook longer.
Taste for salt.
Garnish with oils oil.
'via Blog this'
Wednesday 2 August 2017
Russian slightly salted gherkins.

The gherkin (French - cornichon) is a fruit similar in form and nutritional value to a cucumber.
Gherkins and cucumbers belong to the same species (Cucumis sativus), but are different cultivar groups.
They are usually picked when 4 to 8 cm (1 to 3 in) in length and pickled in jars with brine to resemble a pickled cucumber.
Russian slightly salted gherkins are served to accompany new or young potatoes, You can boil potatoes with or without the skin.
Russian slightly salted gherkins - малосольные огурцы (malosol'nye ogurtsy) - are marinated in salt and spice brine for only a twenty-four hours to obtain less salty-tasting result.
A quicker method for preparing slightly salted Gherkins is to cut off both ends of the cucumbers and cover them with cold salt brine.
These gherkins will be ready to eat in just a day/a twenty-four hours.
Russian slightly salted gherkins:
gherkins, scrubbed (or baby cucumbers): from 500-800 grams to 1 kg.
sparkling water such as "San Pellegrino" – 1 litre
coarse sea salt from 2 to 4 tbs (depending on how salty gherkins you like)
garlic head (peeled) - 1
fresh dill (with dill stems) – large bunch, preferably going to seed, washed.
bay leaves (optional)
celery leaves (optional)
coriander seeds – 2tsp (optional)
black or green pepper corns – 8 (optional)
fresh red chili sliced length wise (optional)
Wash your gherkins, cut off both ends of the gherkins.
Put gherkins into a large pot divide garlic, bay leaves, and dill amongst them.
Stirring salt in cold sparkling water until the salt is dissolved.
Fill the pot with brine so that the gherkins are completely covered.
Cover the pot with cheesecloth, secured with rubber bands, or loosely with the lids.
Store in the fridge.
They need to be left for at least twenty-four hours before using so the gherkins develop flavor (I know – this is the hardest part... but it’s worth the wait!).
Enjoy!
OR try recipe from Olia Hercules:
- A ‘nuclear’ pickle recipe from Ukraine | A Kitchen in Ukraine | Life and style | The Guardian.
Monday 31 July 2017
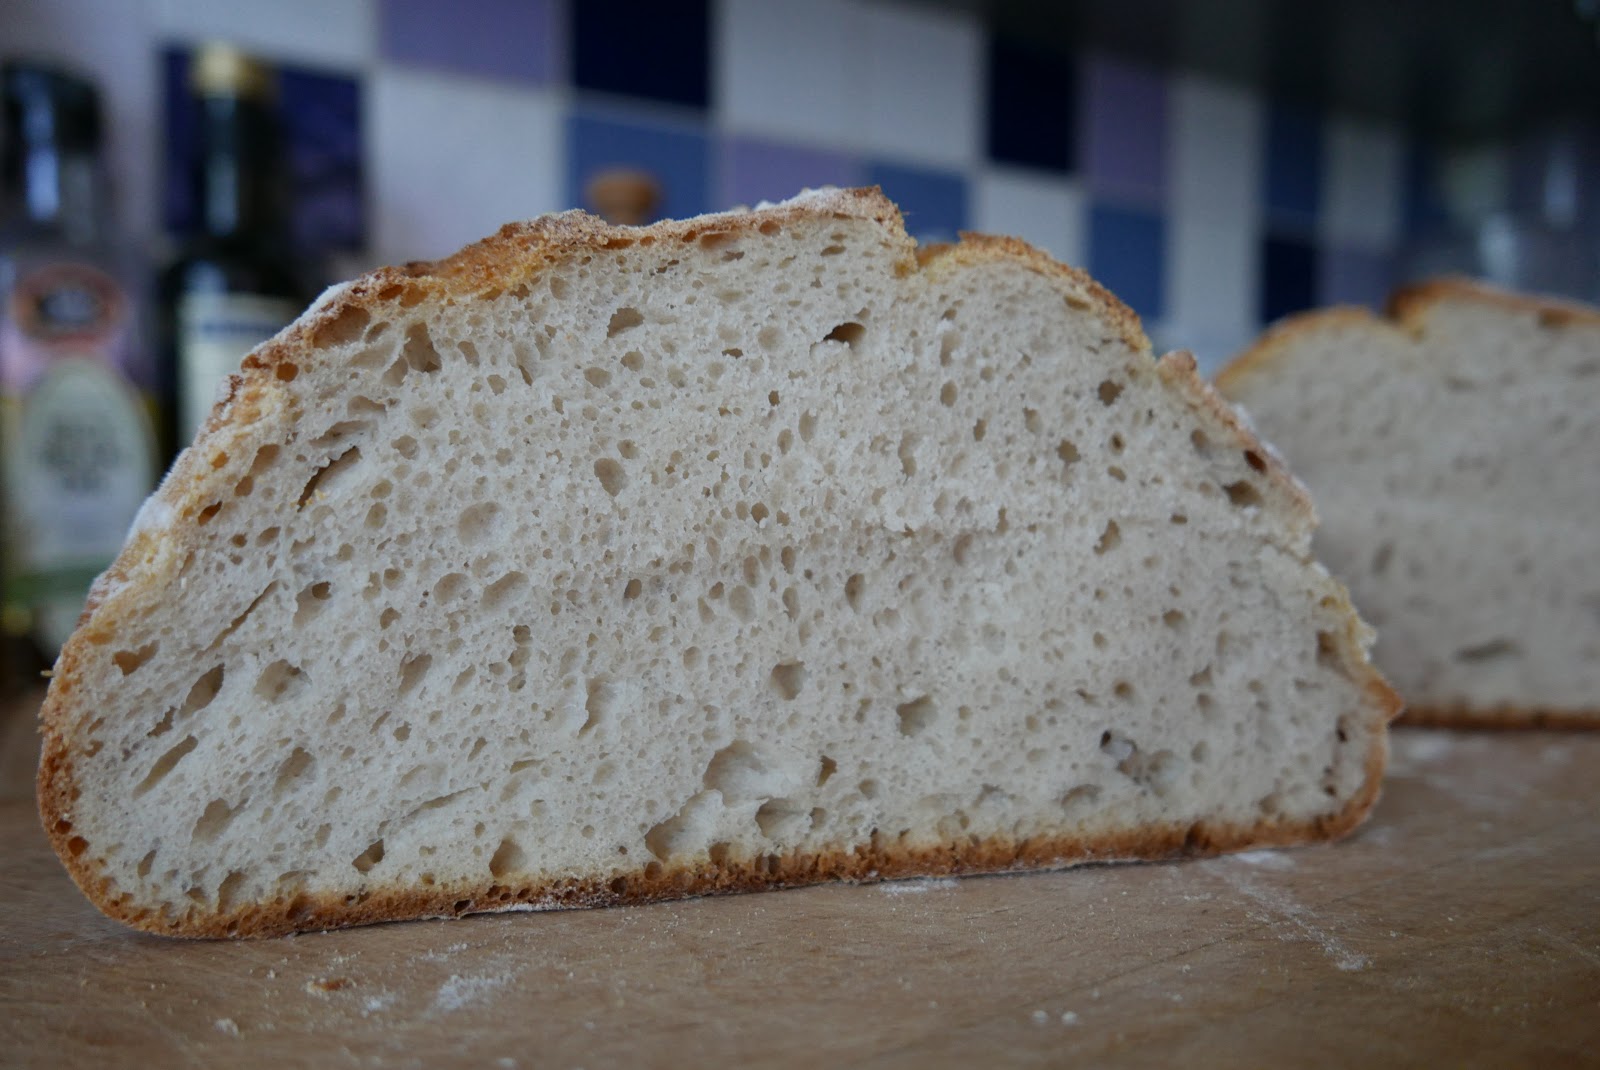
Artisan style overnight bread.

375g (2 3/4 cup + 2 tbsp) all purpose flour
125g (3/4 cup + 3 tbsp) whole wheat flour*
400g (1 3/4 cup) water, lukewarm, 30-35C
12g (2 tsp) fine sea salt
2g (1/2 tsp) instant yeast
95g (1 cup) walnut halves
Preheat the oven to 180C.
When the oven is hot, roast the walnuts for 15-20 minutes in a small baking sheet, stirring halfway through, until the walnuts are lightly browned and smell toasty.
Set aside to cool.

In a large mixing bowl, add the all purpose and whole wheat flour and mix with your clean hand, or a wooden spoon until shaggy.
Cover and let sit for 20 minutes.
Sprinkle the salt and yeast over the top of the dough.
Using wet hands, incorporate the salt and yeast by reaching under the edges of the dough and gently pulling it up and away from the sides of the bowl, then folding the dough to rest on top of salt mixture.
Give the bowl 1/4 turn and repeat, until you've pulled and folded the dough over all the salt and yeast to cover.
Next, pinch the dough into several segments between your first finger and thumb.
Then repeat the folding process to bring the dough back together to one piece.
Repeat this segmenting and folding a couple more times until the salt is well distributed.
Rewet your hands as necessary to prevent the dough from sticking.
All in all, this process will only take 1-2 minutes.
Leave the dough to rest for around 10 minutes, covered.
After ~10 minutes, sprinkle the toasted walnuts overtop, and incorporate with wet hands using the same method you used to add the salt and yeast.
When the walnuts are well distributed with the final folding of the dough, turn the dough ball so the seam is face down in the bowl.
Leave to rest for 20 minutes, covered.
{You will be leaving the dough to rise for a total of 2 to 2½ hours at room temperature.
During this time you will apply 3 folds to the dough every 30 minutes for the first 1 1/2 hours, and then leave it to rise untouched an additional 30-60 minutes.}
After incorporating the walnuts and letting the dough rest for 20 minutes you will apply the first fold.
Using wet hands and the same process you did to fold dough over the salt and nuts, you will reach your hands under a section of the dough, lift gently so not to tear the dough, and place it over top the rest of the dough.
Turn the bowl slightly and repeat around 4 times until you have a nice ball in the bowl.
Rotate the ball so the seam is touching the bowl.
Let rest for 30 minutes.
Repeat the folding.
Rest another 30 minutes and fold for the last time.
Leaving the seam down, let the dough rise at room temperature at least another 30 minutes (no longer if your kitchen is much warmer than 20C).
Move the dough to the fridge and leave overnight, or no longer than 36 hours.
One hour before you are ready to bake the bread, preheat the oven to 250C with your high heat safe dutch oven inside.
While the oven is preheating, shape your bread.
First prepare either a proofing basket or a large mixing bowl.
If using a proofing basket, simply generously flour the basket and use your hands to distribute the flour around the bowl.
If using a large mixing bowl, line it with a lint free towel, and then generously sprinkle flour onto the towel.
Lightly flour a clean work surface, and gently ease the dough (so not to allow the gases formed to escape) onto the counter.
Gently ease the dough into a large rough circle (the shape isn't important), being careful not to tear the dough.
To shape the dough, you will begin with the same folding technique (this time with dry or lightly floured hands).
Take a section of the dough and gently stretch it up until you feel resistance, then fold over the middle.
Take the next section and repeat, and move around the dough until you have created a tight ball.
Take the ball of dough and move over to an unfloured section of the counter.
With the dough sitting on the counter seam side down, cup the dough ball between your hands with your pinky fingers resting on the counter behind it.
Pull the dough towards you, allowing the friction between the dough and counter to pull the dough underneath itself, and using your pinky fingers to prevent the dough from simply rolling.
Turn the dough about a quarter turn and repeat.
Do this until you've gone in a full circle and the skin around the dough ball is taught.
Sprinkle flour over the dough and spread it around with your hands until the dough is not sticky to touch.
Then place the ball of dough into the prepared proofing basket or mixing bowl seam side down.
Dust a little extra flour over top, then cover with a towel and leave to rise for ~60 minutes (If your kitchen is very warm you may only leave it for 45 minutes).
To check the dough is ready for the oven, dip your finger first in a little flour, then poke the dough about 3/4".
If the indentation springs up slightly but then stops, leaving a smaller indentation, the dough is ready to bake.
If it springs up almost 100% right away then it needs more time.
If the dough doesn't spring back at all, it is overproofed, but that's ok, still bake it, just get it to the oven as quickly as possible.
When the dough passes the indentation test, it's time to bake.
Using oven mitts, carefully remove the dutch oven and take the lid off.
Turn the proofing basket upside down on to a floured surface and tap the basket to release the dough.
You should see some cracks on the top of the dough (where the seams were), this is where the dough will expand and crack and where the height of the loaf comes from.
Using two hands, carefully lift the dough and drop it into the dutch oven (be careful of burning yourself!).
Cover the pot and place it into the oven.
Bake for 30 minutes covered.
After 30 minutes, carefully remove the lid, turn the heat down to 230C and bake an additional 20 minutes.
You can bake longer for a darker crust, or slightly less time for a lighter crust.
When you have reached your desired crust, remove the pot from the oven and turn the bread out.
Place it on a cooling rack and allow to cool for at least 20-30 minutes before slicing into.
It finishes baking outside of the oven in these last minutes.
Enjoy your bread!

To store, place cut side down on a cutting board, never place it in fridge, and do not put in a plastic bag.
If it is going to take you more than 3 days to eat the bread, slice it and transfer it to a freezer bag, with pieces of parchment or wax paper between the slices.
Keep frozen and toast as needed.
NOTES
*I often use whole wheat white flour
*Recipe adapted from methods in Flour Water Salt Yeast by Ken Forkish
- Overnight Artisan Walnut Bread • the curious chickpea.
How to Make Shrub.
- How to Make Apple Shrub:
How to Make Apple Shrub:
3 medium apples (choose a variety that is flavorful and sweet)
1 cup apple cider vinegar
2/3 cup granulated white sugar
Shred apples on a box grater.
Funnel the shreds into a wide-mouth quart jar.
Top with apple cider vinegar and sugar.
Use a narrow spoon to stir the apples, vinegar and sugar together.
Apply a watertight lid and give the jar a good shake.
Tuck the jar into the back of your refrigerator and let it sit for four or five days.
Taste the liquid and if you’re happy with the balance, strain out the apple bits, making sure to press firmly to remove all the liquid.
Don’t be afraid to use your (clean) hands for this step.
Place the strained shrub in a clean jar and keep refrigerated. It is ready to use now, but will mature in flavor over time.
Stir it into cocktails, sparkling water or use in homemade vinaigrettes and marinades.
Some combinations that sound particularly appealing:
strawberries + white sugar + red wine vinegar and a splash of balsamic vinegar
blueberries + thinly sliced ginger + cider vinegar
nectarine + peppercorn + brown sugar + white wine vinegar
peach + cardamom pods + honey + cider vinegar
pomegranate + peppercorn + white sugar + red wine vinegar
pear + star anise + brown sugar + white wine vinegar
red plum + cardamom + brown sugar + white wine vinegar (which is what I made here)
- How to Make Shrubs (aka Drinking Vinegars) Without a Recipe:
'via Blog this'
Wednesday 26 July 2017
Persillade from your parsley.
By Carl Legge.
- How to make persillade from your parsley | Permaculture magazine:
Ingredients
100g leafy parsley, washed if necessary and leaves roughly picked off stalks. Don't worry too much about stalks, they will process very well.
10 cloves of garlic, peeled and roughly chopped
About 100-200ml olive oil (or vegetable, rape seed, groundnut)
45ml lemon juice (about ½ lemon) or white wine vinegar
1-2g sea salt, finely ground, or to taste
Method
Finely chop the parsley leaves in a food processor until they reduce in bulk a little.
Add the garlic chunks and process until the herbs and garlic are fine without being liquidised.
Gradually add olive oil while the processor runs until you have a just loose texture to the mixture.
You may have to scrape down the sides of the processor bowl periodically so that it gets mixed evenly.
Once you are happy with the consistency, add the lemon juice or vinegar and salt to taste.
If you are storing the preserve in a jar, top off with oil and pop in the fridge.
Otherwise, pack and freeze straight away.
Use and variations
You can add one or more other ingredients to make different dishes and styles of cooking with very little effort.
If you leave this ‘plain’
* Stir 2 or 3 dessert spoons through cooked pasta. When you drain the pasta leave some cooking water in the pan to help distribute the sauce.
* Mix with flash fried squid, grilled seafood and/or new potatoes.
* Spread on top of grilled or baked fish or potatoes before you roast them
* Use as a base on toasted sourdough, ciabatta or baguettes topped with cheese, olives or other nibbles.
Add lemon zest to make a paste similar to gremolata which is a traditional partner for osso bucco.
Add parmesan and you have a parsley pistou used in minestrone or other soups.
Add nuts for a parsley pesto. Add anchovies for a provençal effect.
Add breadcrumbs for a more-ish delight.
Crunchy coating: Mix with lemon zest, chopped anchovies, a hint of ground cumin and/or paprika and a handful of breadcrumbs.
Use to coat a rack or shoulder of lamb when roasting.
The crunch & punch of the persillade crumbs is a great counterpoint to the soft & sweet lamb.
'via Blog this'
Tuesday 25 July 2017
Saturday 22 July 2017
Rhubarb, Blackcurrant and Orange Jam.

Ingredients
900g Blackcurrants, washed and stalks removed
675g Rhubarb, washed and sliced
Juice of 6 oranges, plus zest of 3
1.5kg Sugar
Method
Place the fruit and orange zest in a large preserving pan.
Add the orange juice, making up quantity with water to make 425ml.
Bring to the boil and gently simmer until fruit is quite soft – about 20min.
Remove from heat.
Add the sugar and stir until dissolved.
Return to the heat and bring to the boil. Boil rapidly until setting point is reached.
Remove any scum.
Poor into cooled, sterilised jars, seal and label.
Rhubarb, Blackcurrant and Orange Jam - Bay Tree Cottage Workshops:
'via Blog this'
Wednesday 19 July 2017
Marrow & ginger jam.

(Makes about 3 x 200g jars)
Remember:
- Setting point is 104.5°C.
- A marrow is a cucurbit, which means it’s from the same family as the melon, cucumber, squash and courgette.
- Size matters - a huge marrow is best reserved for a horticultural competition.
Hunt out the smallest marrow you can find- it should be no bigger than your forearm.
Large marrows will taste bitter and have a watery consistency.
- Marrow is a blank canvas so works well with strong flavours- pile on citrus, chilli, garlic, bacon, spices and robust herbs like rosemary and thyme.
Prepare it:
Weigh the marrow/courgette first and adjust the recipe proportionately:
1 lemon and 30g unpeeled ginger to 40-45g vegetable.
The weight of sugar should be the same as unpeeled marrow/courgette.
The quantities below are those specified in the original recipe.
700g marrow or courgette (peeled, deseeded and in small dice)
700g white sugar
1.5 lemons
45g fresh root ginger (peeled and grated)
- Peel the marrow, remove the seeds and cut into small dice.
Place in a large saucepan.
- Remove the lemon zest using a zester, if available, or the large holes of a grater (being careful not to remove any white pith) and set aside.
Cut the lemon in half and squeeze into a jug.
Place the empty lemon shells and pips into a small muslin bag (or foot section of a clean pair of tights).
- Add a small amount of the lemon juice to the pan, cover with a lid and gently cook the marrow until transparent.
If necessary add some more lemon juice to stop the marrow sticking.
Spoon the marrow and any collected liquids into a blender and liquidise until smooth.
Alternatively the mixture can be mashed for a slightly coarser texture or, providing the dice are very small, left as it is.
- Peel the ginger, grate using the large holes of the grater and add to the lemon zest.
Add the ginger peelings and any very fibrous pieces to the small bag with the leftover lemon pieces.
- Return the marrow mixture to the same pan, add the remaining lemon juice, the lemon and ginger.
Stir in and dissolve the sugar.
Knot the bag of bits and add it to the pan.
- Bring the mixture to the boil and then turn down to a rolling simmer.
Stir regularly, pressing down on the bag of bits occasionally and reduce until the mixture has reached setting point.
Test for a set by putting a half teaspoon of jam on a saucer from the freezer.
If, once it has cooled a little, it wrinkles when pushed with a finger, it should be ready to pot.
If not ready then leave for 5 minutes and try again. (This took about 25 minutes for two-thirds of the full amount above.)
- Put the jars in an oven set to 100C for 10 minutes.
- Remove the small bag of bits, scraping the jam from the outside and squeezing it with tongs and place it on a saucer.
Any extra juices that collect on the saucer should be stirred back into the jam before you start potting.
- Pot into the prepared jars.
Cool and label.
Based on:
- Marrow & ginger jam recipe | BBC Good Food:
- Surprise Lemon & Ginger Jam | Meanderings through my cookbook:
- A Green and Rosie Life: Marrow and Ginger Jam: "Recipe of the Week"
Ingredients
450g/1lb marrow (weighed after peeling) - peeled and cut into small cubes
450g/1lb sugar
1tsp ground ginger or 45-60g crystallized ginger, chopped finely
Juice 1 large lemon
Method
1. Sprinkle the sugar over the marrow, cover and let it stand overnight in a cool place.
2. The next day put the sugar and marrow in a preserving or large pan and warm gently until the sugar has dissolved.
3. Add the ginger and lemon juice then boil steadily until the cubes look transparent and the syrup has set.*
4. Pour into hot, sterilised jam jars and cover at once.
* to check if the syrup has set place some thinly on a cold plate.
Allow it to cool and then push it gently with your finger.
if a skin has formed on the syrup that crinkles up slightly when you push it then setting point has been reached.
If not continue to boil until you do reach setting point.
Occasionally my syrup won't set.
Don't worry if this happens to you.
If this is the case simply call it marrow and ginger sauce and eat it with ice cream, pancakes etc.
'via Blog this'
Tuesday 18 July 2017
Marrow and Ginger Jam.
Ingredients for making 4-5 x 340g jars
1.5Kg Marrows, peeled and chopped into 1cm cubes
1.5Kg Jam sugar with added pectin
200g crystalized ginger – chopped
2 unwaxed lemons
Making your marrow and ginger jam
Put the marrow and the sugar into a non-metallic bowl in layers – so layer of marrow followed by a layer of sugar, and leave, covered, for a couple of hours or overnight if possible.
Put the mixture into the preserving pan along with the ginger, and the grated rind and juice of 2 lemons
Bring to simmer gently and keep stirring until the sugar has dissolved.
Bring to the boil and boil rapidly until setting point has been reached (usually about 4 minutes), remove from the heat immediately after the setting point has been reached.
Allow to cool for 5 mins and stir gently before potting into sterilised jars.
- Allotment Gardener - Marrow and Ginger Jam:
OR:
1.4kg large courgettes, or marrow, weighed after peeling, chopping into 1cm thick pieces and de-seeding
1.8 kg sugar
25 g ginger, grated
rind and juice of 2 lemons, thinly peeled
rind and juice of 1 oranges, thinly peeled
1. Place the courgettes in a large bowl and sprinkle over about 450g of the sugar. Leave overnight.
2. Place the grated ginger, lemon and orange rind on a piece of muslin and tie up the muslin over the mixture. Place the muslin bag in a preserving pan with the courgettes, orange and lemon juices.
3. Simmer for 30 minutes, add the remaining sugar and boil gently until setting point is reached and the courgettes look transparent.
4. Remove and discard the muslin bag. Pot the hot chutney into clean, warm, sterilised jars, cover with waxed paper discs, set aside to cool and cover in the usual way.
'via Blog this'
Subscribe to:
Posts (Atom)