Tuesday, 29 August 2017
Saturday, 12 August 2017
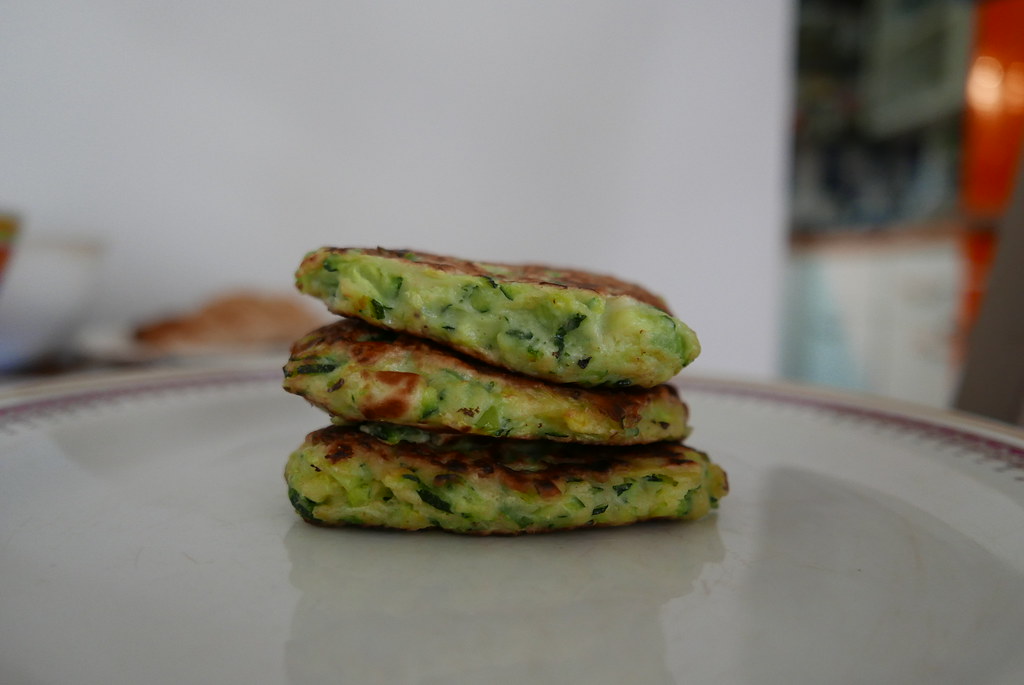
Zucchini fritters.
Zucchini fritters from smitten kitchen.

Yield: About 10 2 1/2 inch fritters
1 pound (about 2 medium) zucchini
1 teaspoon coarse or Kosher salt, plus extra to taste
2 scallions, split lengthwise and sliced thin
1 large egg, lightly beaten
Freshly ground black pepper
1/2 cup all-purpose flour
1/2 teaspoon baking powder
Olive or another oil of your choice, for frying
To serve (optional)
1 cup sour cream or plain, full-fat yogurt
1 to 2 tablespoon lemon juice
1/4 teaspoon lemon zest
Pinches of salt
1 small minced or crushed clove of garlic
Preheat oven to 200C.
Have a baking sheet ready.
Trim ends off zucchini and grate them either on the large holes of a box grater or, if you have one, using the shredding blade of a food processor.
The latter is my favorite as I’m convinced it creates the coarsest and most rope-like strands and frankly, I like my fritters to look like mops.
In a large bowl, toss zucchini with 1 teaspoon coarse salt and set aside for 10 minutes.
Wring out the zucchini in one of the following ways: pressing it against the holes of a colander with a wooden spoon to extract the water, squeezing out small handfuls at a time, or wrapping it up in a clean dishtowel or piece of cheese cloth and wringing away.
You’ll be shocked (I was!) by the amount of liquid you’ll lose, but this is a good thing as it will save the fritters from sogginess.
Return deflated mass of zucchini shreds to bowl.
Taste and if you think it could benefit from more salt (most rinses down the drain), add a little bit more; we found 1/4 teaspoon more just right.
Stir in scallions, egg and some freshly ground black pepper.
In a tiny dish, stir together flour and baking powder, then stir the mixture into the zucchini batter.
In a large heavy skillet — cast iron is dreamy here — heat 2 tablespoons of oil over medium-high heat until shimmering.
Drop small bunches of the zucchini mixture onto the skillet only a few at a time so they don’t become crowded and lightly nudge them flatter with the back of your spatula.
Cook the fritters over moderately high heat until the edges underneath are golden, about 3 to 4 minutes.
If you find this happening too quickly, reduce the heat to medium.
Flip the fritters and fry them on the other side until browned underneath again, about 2 to 3 minutes more.
Drain briefly on paper towels then transfer to baking sheet and then into the warm oven until needed.
Repeat process, keeping the pan well-oiled, with remaining batter.
I like to make sure that the fritters have at least 10 minutes in the oven to finish setting and getting extra crisp.
For the topping, if using, stir together the sour cream, lemon juice, zest, salt and garlic and adjust the flavors to your taste.
Dollop on each fritter before serving.
These fritters are also delicious with a poached or fried egg on top, trust me.
Do ahead: These fritters keep well, either chilled in the fridge for the better part of a week and or frozen in a well-sealed package for months.
When you’re ready to use them, simply spread them out on a tray in a oven until they’re hot and crisp again.
Friday, 4 August 2017
Thursday, 3 August 2017
Chickpea Broccoli Rabe Hearty Soup.
Chickpea Broccoli Rabe Hearty Soup Recipe | The Local Rose:
Ingredients:
3 tsp olive oil
2 slices pancetta, chopped fine (omit for vegetarian version)
1 large or 2 small carrots peeled and diced
2 celery stalks diced
1 onion diced
4 oregano sprigs
A pinch of dried chile flakes (optional)
salt
4 garlic cloves chopped
2 cups cooked chickpeas
2 cups chickpea cooking liquid
2 cups chicken stock (or vegetable)
1 bunch broccoli rabe
Olive oil
Heat heavy soup pot add: 2 tsp oil, pancetta.
Cook for 3 minutes add, carrots, celery, onion, oregano, chile.
Cook stirring now and then, until soft and slightly brown about 12 minutes.
Turn heat down if too brown.
When vegetables are cooked add: salt, garlic, chickpeas, chickpea liquid, stock.
Bring to a boil, reduce to simmer.
Cook for 10 minutes.
Meanwhile trim and rinse the broccoli rabe and discard stems.
Chop coarsely and add to the soup.
Cook for 10 minutes.
If not tender cook longer.
Taste for salt.
Garnish with oils oil.
'via Blog this'
Wednesday, 2 August 2017
Russian slightly salted gherkins.

The gherkin (French - cornichon) is a fruit similar in form and nutritional value to a cucumber.
Gherkins and cucumbers belong to the same species (Cucumis sativus), but are different cultivar groups.
They are usually picked when 4 to 8 cm (1 to 3 in) in length and pickled in jars with brine to resemble a pickled cucumber.
Russian slightly salted gherkins are served to accompany new or young potatoes, You can boil potatoes with or without the skin.
Russian slightly salted gherkins - малосольные огурцы (malosol'nye ogurtsy) - are marinated in salt and spice brine for only a twenty-four hours to obtain less salty-tasting result.
A quicker method for preparing slightly salted Gherkins is to cut off both ends of the cucumbers and cover them with cold salt brine.
These gherkins will be ready to eat in just a day/a twenty-four hours.
Russian slightly salted gherkins:
gherkins, scrubbed (or baby cucumbers): from 500-800 grams to 1 kg.
sparkling water such as "San Pellegrino" – 1 litre
coarse sea salt from 2 to 4 tbs (depending on how salty gherkins you like)
garlic head (peeled) - 1
fresh dill (with dill stems) – large bunch, preferably going to seed, washed.
bay leaves (optional)
celery leaves (optional)
coriander seeds – 2tsp (optional)
black or green pepper corns – 8 (optional)
fresh red chili sliced length wise (optional)
Wash your gherkins, cut off both ends of the gherkins.
Put gherkins into a large pot divide garlic, bay leaves, and dill amongst them.
Stirring salt in cold sparkling water until the salt is dissolved.
Fill the pot with brine so that the gherkins are completely covered.
Cover the pot with cheesecloth, secured with rubber bands, or loosely with the lids.
Store in the fridge.
They need to be left for at least twenty-four hours before using so the gherkins develop flavor (I know – this is the hardest part... but it’s worth the wait!).
Enjoy!
OR try recipe from Olia Hercules:
- A ‘nuclear’ pickle recipe from Ukraine | A Kitchen in Ukraine | Life and style | The Guardian.
Subscribe to:
Comments (Atom)


